Tool Builder
Overview
Enables you to create standalone HTML web applications using AI (like ChatGPT, Claude, or Gemini) and run them directly within your Excel workbook.
Your spreadsheet becomes both the web server and the database. There is no need to host your app on a separate server or manage a complex backend. Security is inherited from the workbook itself: if you share the workbook, the recipient can use the app immediately without separate authentication.

Web Demo
No installation or Excel account required. Explore the pre-configured interactive model directly in your browser:
Value Proposition
- Zero Infrastructure: Deploy custom tools in seconds without worrying about servers, hosting, or deployment pipelines.
- AI-Driven Development: Designed specifically to work with Large Language Models. Just paste our "Builder Guide" into your AI chat, and it knows exactly how to build your tool.
- Data Sovereignty: Your app data is stored in standard Excel tables within the workbook. It never leaves your environment.
- Built-in Persistence: Custom app code is saved in the workbook's internal settings, making your tools as portable as the file itself.
Applications
The Tool Builder can be used to create a wide variety of interactive applications directly within your Excel workbook. From simple project trackers and Kanban boards to complex, interactive data visualizations, it turns your spreadsheet into a versatile application platform.
See the Example Tools site for a collection of chart and dashboard examples that can be useful references when designing Tool Builder apps.
Getting Started
1. Installation
The Tool Builder is an Office Content Add-in. Once added to your workbook, it appears directly on the canvas as an interactive object. You must be signed in with your Microsoft Office account; the add-in uses Single Sign-On (SSO) to authenticate securely via your active Excel session.
2. The Welcome Screen
When you first open the add-in, you'll see the welcome screen. This is your starting point for creating new tools or loading examples.
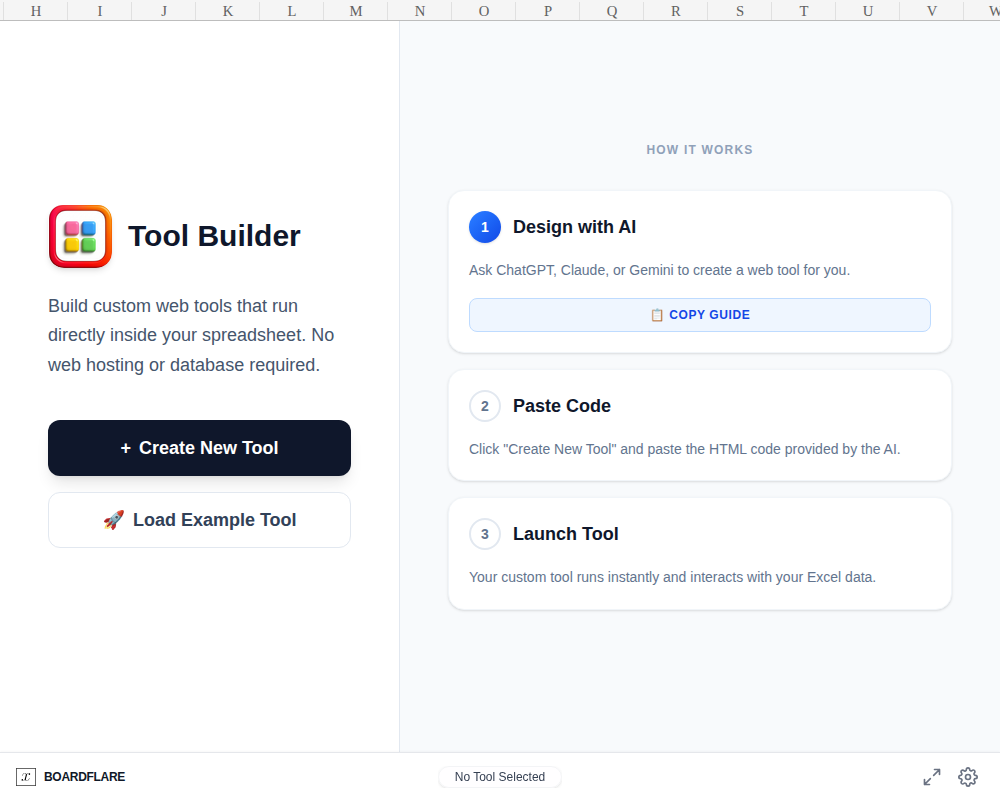
- Copy the Guide: Click "Copy Guide" to copy the latest technical specifications to your clipboard.
- Prompt your AI: Open ChatGPT, Claude, or Gemini. Paste the guide first, then describe the tool you want to build.
Example: "Using this guide, build a simple project tracker with a Kanban board view."
Alternatively, click 🚀 Load Example Tool on the welcome screen to instantly load a fully functional Kanban Project Tracker, which lets you explore the interface and see how it interacts with Excel before building your own.
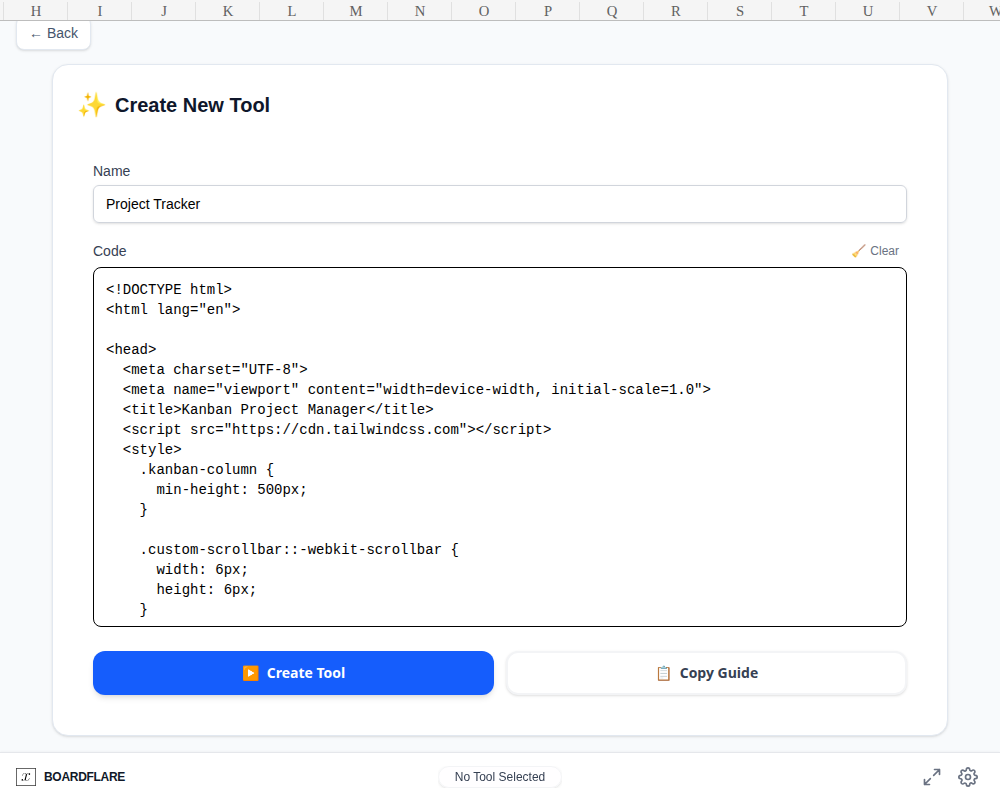
3. Creating Your Tool
Once the AI generates the HTML/JavaScript code:
- Click "Create New Tool" on the welcome screen.
- Paste the code into the editor.
- Give your tool a name and click "Create Tool".
:::warning Code Size Limit Tool Builder enforces a ~160KB character limit per tool to ensure your workbook remains fast and stable. If your code exceeds this limit, the editor will display a warning and the Run button will be disabled. Avoid embedding large images or massive external libraries directly in the code. :::
4. Running & Interacting
Your tool launches instantly. If your app defines tables (like a 'tasks' table), the Tool Builder automatically creates a new worksheet and an Excel table for each one. Table columns are automatically formatted as Text to prevent Excel from converting IDs or fraction-like strings into dates. Any data you enter in the tool is saved directly to these Excel tables.

5. Settings & The Editor
You can always tweak your tool's code or view its version history. Click the Settings (gear) icon to open the menu.
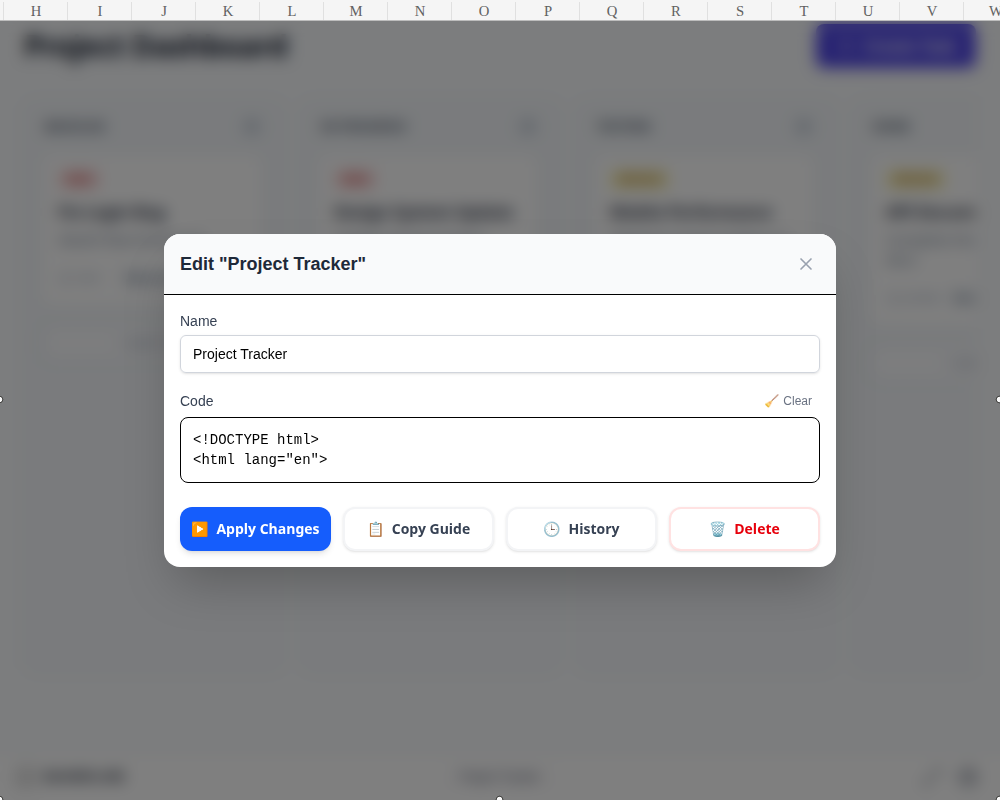
- Edit: Opens the code editor for manual changes. Your current code is pre-loaded, and you can paste updated code from your AI assistant.
- History: Tool Builder automatically keeps the 3 most recent versions of your code. Click History to see a list of timestamps, hover over an older version, and click Restore to load it into the editor.
- Delete: Removes the tool and its code from the workbook. Your Excel tables and data are preserved — only the application code is deleted.
Architecture
The Tool Builder operates as a secure bridge between your custom, AI-generated web applications and the host Excel environment. It uses an embedded, sandboxed iframe to run your HTML, CSS, and JavaScript, while a lightweight API handles secure communication with the spreadsheet.
Secure Sandbox Environment
When you run a tool, the Tool Builder creates an isolated <iframe> environment. This sandbox approach ensures that:
- Security: The custom application code is restricted and cannot access the broader workbook or your local system directly.
- Isolation: CSS styles and global variables within your tool do not conflict with the Excel add-in or the Office host.
- Portability: Your code runs within standard web technologies, keeping it predictable and entirely self-contained.
The Workflow
- Generate: You provide a prompt along with our versioned Builder Guide to an AI (like ChatGPT, Claude, or Gemini). The AI generates standard HTML/JS that implements the
bfcontract. - Paste: You copy the generated code into the built-in code editor. The code is saved as internal document properties, meaning the app travels with the
.xlsxfile. - Run: The code is injected into the secure sandbox. It initializes the "Boardflare Bridge" (
bf) API to begin talking to the Excel grid.
Real-time Coauthoring
Because the Tool Builder stores all application data in standard Excel tables, it inherits Excel's native coauthoring capabilities.
- Synchronized State: When multiple users have the same workbook open, changes made by one user in their tool are written to the grid and automatically synced to all other users.
- Automatic UI Updates: The Boardflare bridge detects these incoming changes and triggers the
onSynccallback in every active instance of your tool, ensuring all users see the same live data simultaneously.
Full-Screen Mode (Excel on Web)
For complex dashboards or immersive applications, the Tool Builder supports a full-screen mode when running in Excel on the Web.
- Immersive Experience: Click the expand icon in the add-in header to toggle your tool into a full-page overlay, maximizing your workspace.
- Seamless Integration: Your app remains fully connected to the underlying spreadsheet while in full-screen mode, allowing for uninterrupted data interaction.
The Bridge API (window.bf)
The core of the system is a lightweight JavaScript bridge that manages bidirectional communication between the sandboxed tool and the Excel add-in.
- Schema Enforcement (Create & Manage Tables): When your app calls
bf.ready(), the bridge verifies if the required Excel tables exist. If they don't, it creates them automatically, ensuring the spreadsheet structure matches your app's expectations. - Persistent State (Read & Write): Methods like
bf.addRoworbf.updateRowsecurely serialize data from the sandbox and request the add-in to write it directly to the spreadsheet cells. - Real-time Sync: The add-in continually monitors the underlying Excel tables for changes. When a user or an Excel formula modifies a cell linked to your app, the bridge pushes the updated state down to your tool, triggering the
onSynccallback to update your UI.
API Reference
The following methods are available via the global bf object in your tool:
bf.ready(options)
Initializes the tool and defines the required table schema.
await bf.ready({
  tables: {
    tasks: {
      columns: { title: 'string', status: 'string', priority: 'number' },
      seed: [{ title: 'New Task', status: 'Backlog', priority: 1 }]
    }
  },
  onSync: (tableName, rows) => {
    // Handle real-time updates from Excel
    updateUI(rows);
  }
});
bf.getRows(tableName)
Retrieves all data from a specific table.
const rows = await bf.getRows('tasks');
bf.addRow(tableName, data)
Adds a new record to the specified table.
await bf.addRow('tasks', { title: 'Fix Bug', status: 'In Progress', priority: 2 });
bf.updateRow(tableName, rowId, updates)
Updates an existing record by its unique _id.
await bf.updateRow('tasks', 'row_123', { status: 'Done' });
bf.deleteRow(tableName, rowId)
Removes a record from the table.
await bf.deleteRow('tasks', 'row_123');
Best Practices
- Always use the Guide: LLMs perform significantly better when they have the current
bf-guide.txtin their context window. - Table Prefixes: The system automatically prefixes tables with
bf_(e.g.,bf_tasks) to prevent conflicts with your own workbook data. The worksheet itself will be named without the prefix (e.g.,tasks). - Bootstrap 5: The bridge includes Bootstrap 5.3 by default, so you can use standard Bootstrap classes for styling without needing to import them.
- Keep code lean: Stay within the 160KB code size limit. Avoid inlining large assets; reference external CDN resources when possible.
Error Handling & Troubleshooting
Runtime Errors
If your tool crashes while running, a red error screen will appear showing the exact error message along with an inline code editor.
- Click Copy Error — this bundles the error message, developer console logs, and your current HTML code into a single prompt.
- Paste that text into your AI assistant. The AI will analyze the logs, fix the bug, and return corrected code.
- Paste the new code into the inline editor and click Run.
App Crashes (Error Boundary)
If a critical failure occurs with the Tool Builder interface itself (not your web tool), you will see a "Something went wrong" screen with a technical error code. Click Reload Interface to safely restart the add-in without losing your saved data.
Common Issues
- "Unable to connect to workbook": Ensure you are using a desktop or web version of Excel that fully supports Office.js APIs. Refreshing the page (on Excel for Web) often resolves connection timeouts.
- Data isn't syncing: Verify the Excel table retains its
bf_prefix in the Table Design settings. Do not manually rename the table in the Excel ribbon, or the tool will lose its connection to the data.